
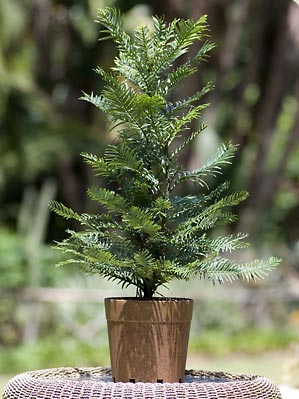
WOLLEMI PINE
CocoEarth, was originally developed to meet the needs of this rare plant. It is a premium grade Cocopeat mix and can be used for all types of plants.
Designed to promote healthy root growth and to minimize the impact of irregular watering. It is free draining with a high air filled porosity to protect plants from over watering. High water retention efficiency combined with high water holding capacity will keep your plants healthy and strong with less required watering.
CocoEarth is made with premium quality CocoPeat and CocoBark.
A suitable controlled release fertiliser should be mixed with CocoEarth for plant nutrition prior to planting.
CocoEarth is biologically stable and retains its physical structure for many years, as it does not contain composted Pine bark, green waste or sewage sludge.
- Cocopeat premium graded coir
- High water retention efficiency
- Clean and pine bark free.
- Free draining. Easily re-wets.
- Long lasting. No shrinkage.

Wollemi Pine is the registered trademark of
Birkdale Nursery Holdings Pty. Ltd. ABN 78 094 776 682. www.wollemipine.com
Feeding
Cocoearth substrate for the Wollemi Pine contains no fertilizer. A controlled release fertilizer can be reapplied to the surface of the pot (placed under the mulch if present). A low phosphorus fertilizer suitable for natives is recommended. Use at the rate shown on the product label.
Watering
Water by saturating the plant as soon as the potting mix/soil becomes dry in the top 5cm of the pot – this may be once or twice a week.
The Wollemi Pine does not tolerate over watering and will not survive if held for excessive periods in a constantly moist potting mix. Ensure you do not to keep the plant sitting in a saucer of water.
As a general rule of thumb, the lower the light level, the less water loss.
Plants in the ground will usually need to be watered less often than those in pots. Once again water should be applied when the surface soil becomes dry. Apply enough water to wet the full volume of soil in the planting hole.
Caring For Your Living Fossil

Planting Outdoors
1. 2. 3. 4. 5. 6. 7. 8 9. 10. 11. 12. Water the plant and the ground where it is to be planted.
Dig a hole that is 3-4 times larger than the dimensions of the pot. Breaking up the soil in this way will help the roots grow out from the root ball, increase aeration and the spread of irrigation water.
Break up any shining surfaces on the walls of the hole. These surfaces can be a barrier to roots.
Place the soil from the hole on a plastic sheet and mix with an equivalent volume of CocoEarth. If the soil is very heavy or of poor quality use less of it in the blend.
Water the soil in the hole and allow to drain.
Place some of this soil/CocoEarth blend back in the hole to form a small mound.
Remove the plant from the pot. Tease out some of the roots to encourage their development into the surrounding soil.
Place the plant in the centre of the hole resting on the mound of soil/CocoEarth blend. Adjust the depth of planting until the top of the root ball is around 8-10 cm above the ground level.
Refill the hole, mounding the soil up to cover the root ball. Leave a channel around the outside of the hole to collect rain and irrigation water and hold it until it can soak into the soil.
Water the plant thoroughly.
Cover the mound and the surrounding soil surface with CocoMulch. This will deter weeds, protect the surface roots from extremes of temperature and maintain soil moisture.
Finally, protect the plant with shade cloth until it is established. The plant may scorch severely if immediately planted out in full sun.

Re-Potting
1. 2. 3. 4. 5. 6. 7. 8 9. 10. 11. Water the plant before it is re-potted to minimise transplant shock.
Choose a pot that has good drainage in the base.
Put some potting mix in the base of the new pot.
Remove the plant from its pot.
Tease out some of the roots to encourage growth from the root ball into the new mix.
Place the plant in the centre of the pot resting on the potting mix. Adjust the depth of planting until the top of the root ball is around 2 cm below the rim of the new pot.
Fill the gap between the root ball and the outside of the pot with potting mix. Tamp it down gently with your hands as you go.
Tap the base of the pot on a hard surface to help settle the mix in.
Water the pot well from above and top up with fresh potting mix if necessary.
Plants in hot or very dry conditions will benefit from a layer of CocoMulch on the surface of the mix. This will keep the roots cool and prevent the potting mix from drying out too quickly.
Place the newly potted plant in a shaded area for the first week and then gradually introduce it to full sun if required. Plants that have been grown under shade will quickly burn if this procedure is not followed.
© 2024 Galuku International. All right reserved